About SecHub
SecHub stands for "Security Hub" and serves as an unified API to scan for various security issues. With SecHub, users don’t need to worry about the specific scanning product used on the server side; they simply configure their desired security goals.
|
The SecHub server alone does NOT provide a security infrastructure but orchestrates different security products/tools. Please check our ready to use security open source tools: PDS solutions for integration with SecHub server. |
It was designed to be very easy to integrate into existing build / contionus integration (CI) pipelines and helps to provide SecDevOps.
|
You can get more documentation from the SecHub web page . The project is hosted at https://github.com/mercedes-benz/sechub |
About documentation
This documentation is part of SecHub.
| Key | Value | Information |
|---|---|---|
LICENSE |
MIT License |
Please look at https://github.com/mercedes-benz/sechub/blob/master/LICENSE |
Documentation version: Server 2.14.0 - Build date: 2025-09-01 14:49 (UTCZ)
1. Target audience
In case you are a developer, this guide is for you.
-
Users: In case, you are an enduser and want to use the SecHub client please have a look at our client documentation
-
Operations: In case, you are an administrator or operation engineers, who just wants to run SecHub have a look at the SecHub Getting Started Guide: https://mercedes-benz.github.io/sechub/latest/sechub-getting-started.html
2. Guide
This guide describes how to get started with SecHub from a developer perspective.
The following topics are covered:
-
Getting SecHub
-
Building SecHub
-
Starting SecHub server in Integration Test mode
-
Default passwords
-
Working with the REST API
-
Creating a project on SecHub server
-
Code scan with the SecHub client
-
Stopping the server
2.1. Requirements
-
Java JDK 17+
-
Go 1.24.4+
-
Git
-
cURL
-
jq
|
Only long term support (LTS) versions of Java are supported. SecHub can be build and runs with OpenJDK Hotspot and Eclipse OpenJ9. |
2.1.1. Alpine Linux
apk add openjdk17 go curl git bash jq| Tested with Alpine Linux 3.12, 3.13 and 3.14. |
2.1.2. Debian/Ubuntu
sudo apt install openjdk-17-jdk-headless golang git curl jq| Tested with Debian 10 "Buster", Ubuntu 18.04 "Bionic" and 20.04 "Focal" LTS. |
| If the version of your GoLang is below 1.24.4, please install a more recent version from here. |
2.1.3. Fedora and CentOS
sudo dnf install java-17-openjdk-devel golang git curl jq| Tested with Fedora 34 and CentOS 8. |
2.1.4. MacOS
To easily install the requirements via cli you can use brew.
brew install openjdk@17 go git curl jq| Tested with MacOS Ventura 13.3.1. |
2.2. Instructions
Let’s start with:
-
Cloning the repository
cd ~
git clone https://github.com/mercedes-benz/sechub.git
cd sechub
Proxy:
In case you have to connect via proxy to the internet, please have a look on how to setup a proxy in the Gradle documentation: Accessing the web through a HTTP proxyExample:
Add these lines to your ~/.gradle/gradle.properties file:systemProp.http.proxyHost=yourproxy.youcompany.com systemProp.http.proxyPort=3128 systemProp.http.proxyUser=userid systemProp.http.proxyPassword=password systemProp.http.nonProxyHosts=*.nonproxyrepos.com|localhost
-
Build SecHub
./buildExecutables
-
Start SecHub server in Integration Test mode
./gradlew startIntegrationTestServer
Do not use the Integration Test Server mode in production. -
Credentials
These are the initial credentials when starting SecHub server in
integration-testmode:SecHub Superadmin:
username: int-test_superadmin
password: int-test_superadmin-pwd
SecHub User Account:
username: int-test_onlyuser
password: int-test_onlyuser-pwd
-
Environment variables
Set search path and environment variables for the SecHub client and
sechub-api.shscript:export SECHUB_SERVER=https://localhost:8443 export SECHUB_USERID=int-test_superadmin export SECHUB_APITOKEN=int-test_superadmin-pwd export SECHUB_TRUSTALL=true export PATH="$PATH:`pwd`/sechub-cli/build/go/platform/linux-amd64:`pwd`/sechub-developertools/scripts" -
Test: List all users as administrator
sechub-api.shis a helper Bash script based oncurlthat eases the use of the SecHub server REST API. We use it here to get a list of the users.sechub-api.sh user_listExpected result:
[ "int-test_onlyuser", "int-test_superadmin" ] -
Create a project on SecHub server
The output of the API calls are omitted here for better readability:
# Create "testproject" sechub-api.sh project_create testproject int-test_superadmin # Assign "int-test_superadmin" as scan user to our project sechub-api.sh project_assign_user testproject int-test_superadmin # List project details sechub-api.sh project_details testproject -
Scan with SecHub client
Let’s do a scan of our SecHub code:
sechub -project testproject -reportformat html scan

WARNING: Configured to trust all - means unknown service certificate is accepted. Don't use this in production!
 _____           _   _       _
/  ___|         | | | |     | |
\ `--.  ___  ___| |_| |_   _| |__
 `--. \/ _ \/ __|  _  | | | | '_ \
/\__/ /  __/ (__| | | | |_| | |_) |
\____/ \___|\___\_| |_/\__,_|_.__/ Client Version 0.0.0-1ba48fa-dirty-20220426102342

2022-04-26 10:33:34 (+02:00) Zipping folder: . (/home/user/sechub)
2022-04-26 10:33:34 (+02:00) Creating new sechub job
2022-04-26 10:33:34 (+02:00) Uploading source zip file
2022-04-26 10:33:35 (+02:00) Approve sechub job
2022-04-26 10:33:35 (+02:00) Waiting for job 2fbb0553-db8c-4edb-827e-afed282f4140 to be done
                             .
2022-04-26 10:33:37 (+02:00) Fetching result (format=html) for job 2fbb0553-db8c-4edb-827e-afed282f4140
2022-04-26 10:33:38 (+02:00) SecHub report written to sechub_report_testproject_2fbb0553-db8c-4edb-827e-afed282f4140.html
  GREEN - no severe security vulnerabilities identified
Congratulations! You have done your first SecHub code scan.
You can open the SecHub report file in your browser.In order to scan, you need a sechub.jsonconfig file. In our case, it is already in the repository so we can use it right away.
For real results, you have to define an 'execution profile' with a scanner (via a product adapter) attached. Assign it to your project and you get real results. Have a look at the SecHub operations documentation for details. -
Stop SecHub integration test server
./gradlew stopIntegrationTestServer
2.2.1. Troubleshooting
2.2.1.1. Log files
Open the log file ./sechub-integrationtest/integrationtest-server.log to get more details about the problem.
3. Start Contributing
-
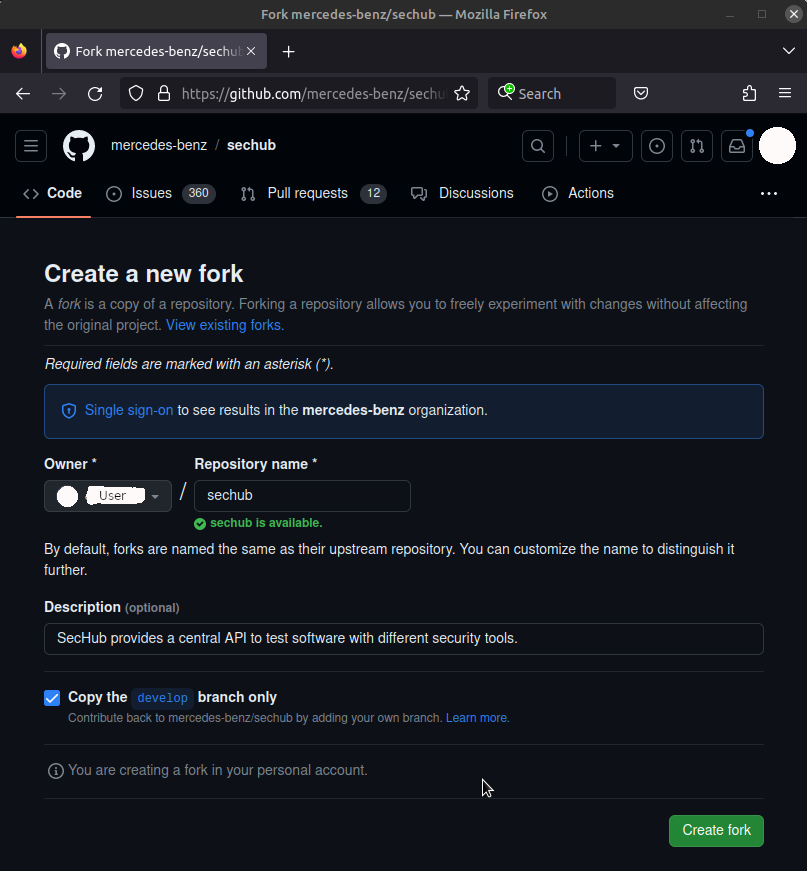
Fork SecHub: https://github.com/mercedes-benz/sechub/fork
-
Select a SecHub issue you want to work on: https://github.com/mercedes-benz/sechub/issues
Issues have labels a good way to start is to look for issues with good first issueorhelp wanted. Issues with labelsbeginner,intermediate,advancedindicate the level of difficulty. However, not all issues are labeled. In addition, if you like an issue just comment on it, so that we can assign you to it.-
In case, the issue you want to work on does not yet exist, please create an issue.
-
-
Create a new branch on your local fork following the naming pattern
feature-<issue-number>-<short-description>Example: feature-36-go-client-supports-env-variable. -
Set Up git configurations as explained here: Configure your git settings
-
Set up your IDE
-
Implement your changes
Please follow our coding conventions: Coding conventionsIn case, you have any questions or need clarification ask inside the issues -
Run the tests locally
-
From within the (Eclipse) IDE
-
Using the
sdc.shhelper script (located in thesechubrepository folder)# Run all Unit Tests ./sechub-developertools/scripts/sdc.sh -u # Run all Integration Tests ./sechub-developertools/scripts/sdc.sh -i
sdc.shis a convenience wrapper around thegradlewtool, which bundles the CLI calls into use cases.
-
-
Create a pull-request and merge your changes into SecHub
4. Setup IDE for SecHub
Our supported setup is:
-
Eclipse IDE
-
IntelliJ
-
Git
-
Debian based GNU/Linux
-
x86 64-bit CPU
-
Docker
In case your setup differs, please try to adjust the guides to your setup. Any contributions for other setups are welcome. Feel free to create pull requests for this guide with your setup.
4.1. Setup SecHub in Eclipse IDE
-
Please, first create a fork of SecHub on GitHub: https://github.com/mercedes-benz/sechub/fork
-
On your local Linux computer create a new folder
Developmentin your home folder$ mkdir "$HOME/Development"
-
Change into the
Developmentfoldercd "$HOME/Development"
-
Download
Eclipse IDE for Java DevelopersorEclipse IDE for Enterprise Java and Web Developers# Download Eclipse IDE for Enterprise Java and Web Developers wget http://www.mirrorservice.org/sites/download.eclipse.org/eclipseMirror/technology/epp/downloads/release/2023-09/R/eclipse-jee-2023-09-R-linux-gtk-x86_64.tar.gz # Download checksum wget http://www.mirrorservice.org/sites/download.eclipse.org/eclipseMirror/technology/epp/downloads/release/2023-09/R/eclipse-jee-2023-09-R-linux-gtk-x86_64.tar.gz.sha512 # Verify checksum sha512sum -c eclipse*.sha512 # Extract archive tar -xf eclipse-jee-2023-09-R-linux-gtk-x86_64.tar.gz # Remove downloaded files rm eclipse-jee-*
As end result an
eclipsefolder containing theeclipseexecutable should be available.www.mirrorservice.org is provided by the University of Kent School of Computing. -
Create a
projectsfoldermkdir projects
-
Switch into the project folder
mkdir projects
cd projects/
We create a projectsfolder, because there are several SecHub projects. For example, the "sechub-<ide>` plugins are separated into different repositories. -
Clone the SecHub repository (your fork)
git clone https://github.com/<your-github-username>/sechub.git
After, successfully cloning the repository. There should be a folder named
sechubcontaining the source code. -
Go one level up into to the
Developmentfolder$ cd .. $ pwd /home/<user>/Development $ ls eclipse projects
-
Create a
workspaces/sechubfolder for the Eclipse IDE to store settings inmkdir -p workspaces/sechub
-
Check the folder structure
The folder structure should look like this:
$ pwd /home/user/Development $ tree -L 2 . ├── eclipse │ ├── artifacts.xml │ ├── configuration │ ├── dropins │ ├── eclipse │ ├── eclipse.ini │ ├── features │ ├── icon.xpm │ ├── p2 │ ├── plugins │ └── readme ├── projects │ └── sechub └── workspaces └── sechub -
Go into the
eclipsefolder and starteclipsecd eclipse ./eclipse
-
Select the
workspaces/sechubfolder as workspace folder and press theLaunchbutton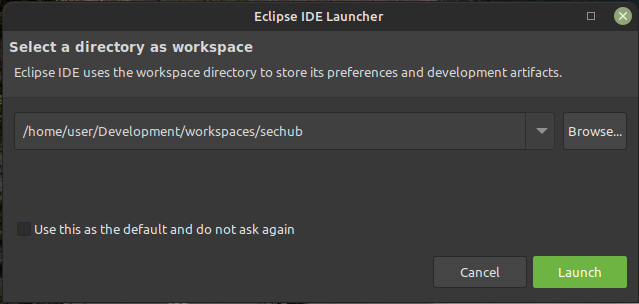
-
Install the EGradle IDE Plugin
-
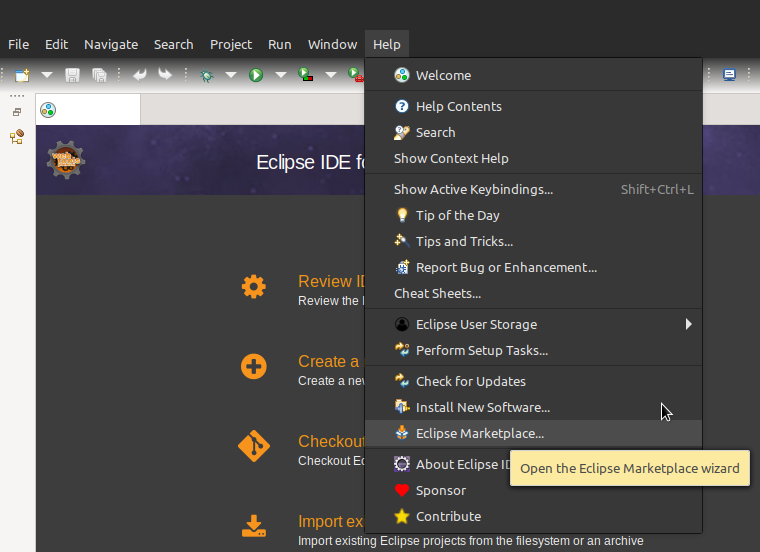
In the Eclipse IDE menu click the help menu and select marketplace
-
To search for the EGradle IDE Plugin, type
egradle ideinto theFindintput box and press enter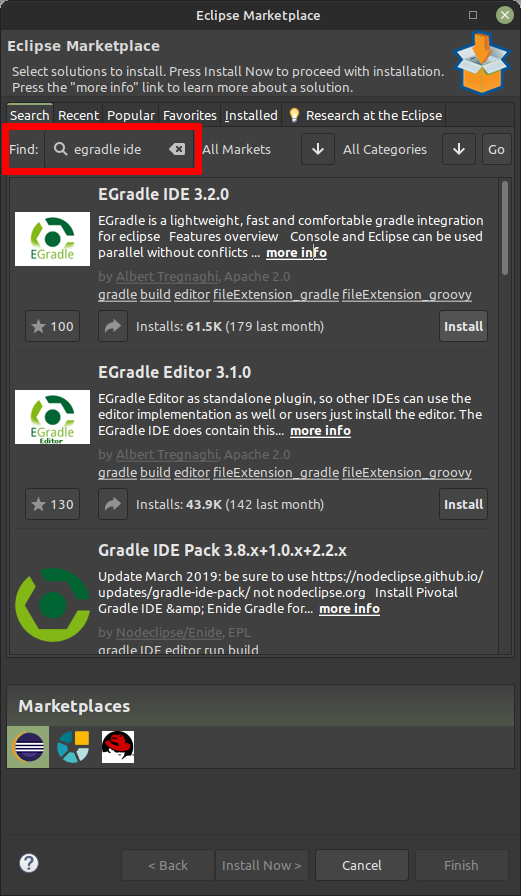
-
Select the EGradle IDE Plugin and press install. Next follow the installation wizard.
The creator and developer of the EGradle IDE Plugin is a SecHub developer. However, the EGradle IDE Plugin is a private project and not affiliated with SecHub.
-
-
Import the SecHub project into the workspace
-
Select
Importfrom theFilemenu
-
Select the
EGradle → Import gradle root project with all subprojectsoption and select next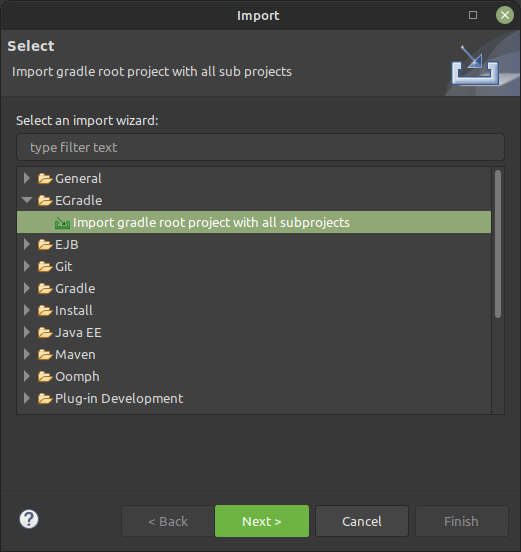
-
The EGradle Import Wizard opens up. Next, click
Browse…after theGradle root project pathinput box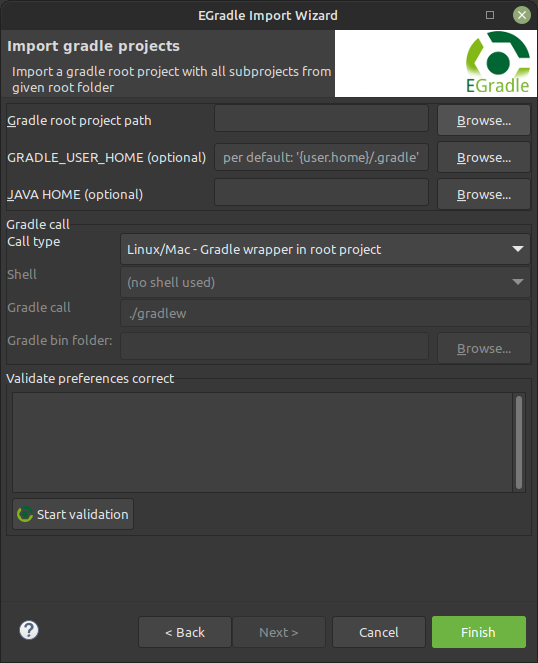
-
A file dialog opens, select the
Development/projects/sechubfolder (previously cloned)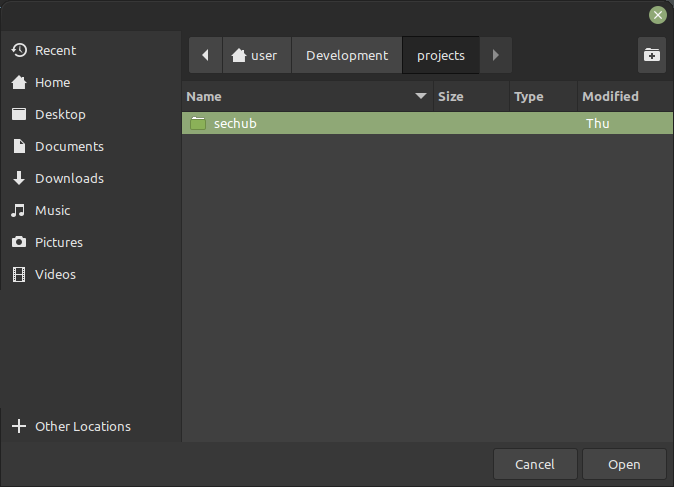
-
The
sechubfolder is selected. Next, click theFinishbutton to import the SecHub project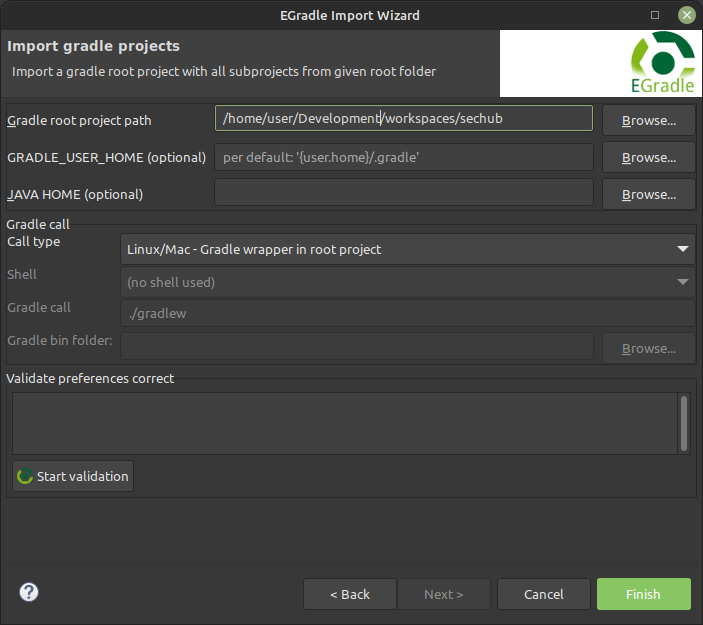
-
The import will take some time. Once, successfully imported all SecHub sub-projects, a
Virtual Rootand the success message in the console should be visible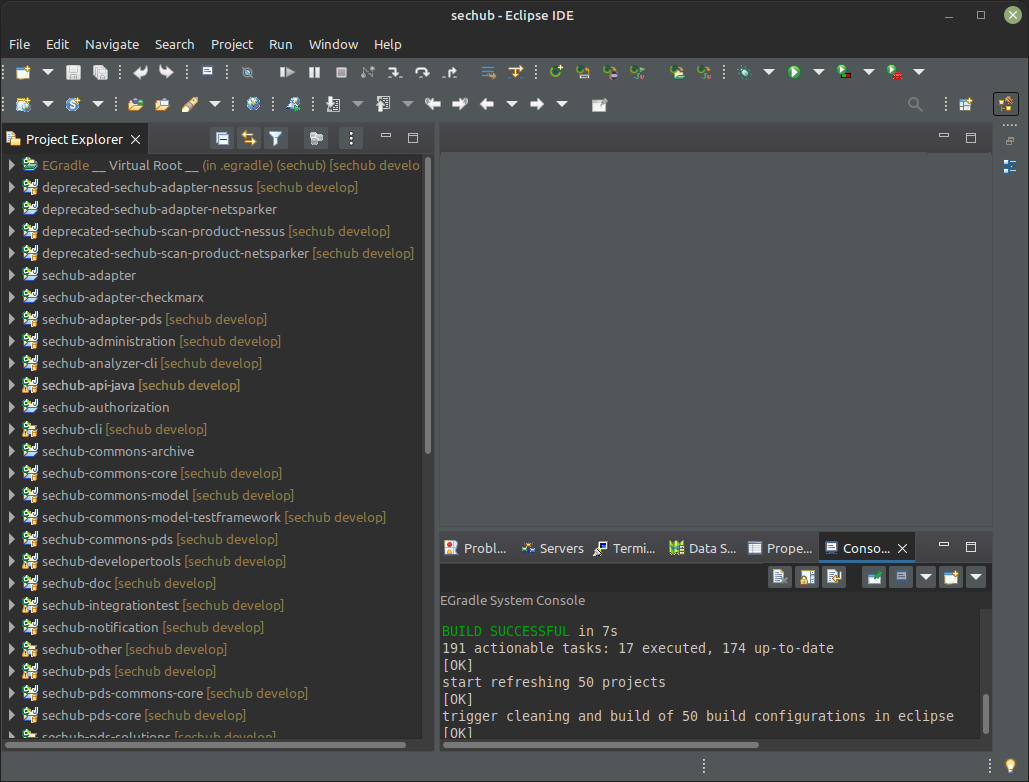
-
4.1.1. Add Sechub Java Code Formatter
-
Download the formatter xml file here and unzip it.
-
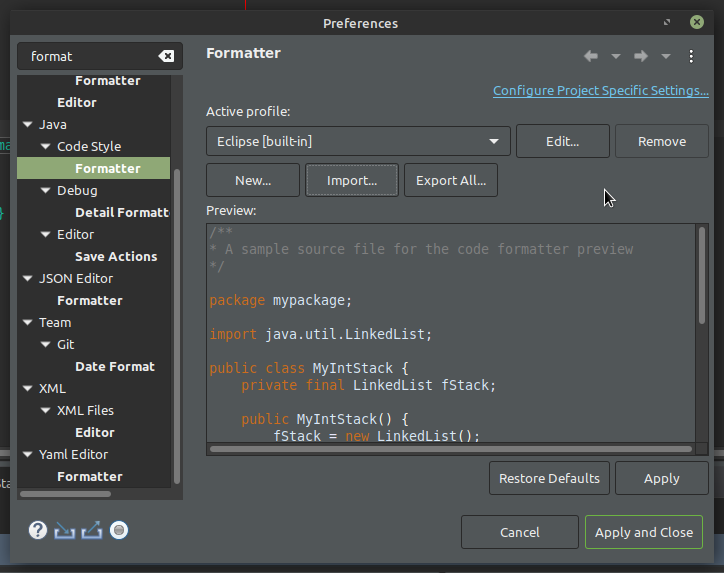
Open Java Formatter page in preferences (Window→Preferences). Then press the import button and select the former unpacked xml file.
-
Ensure SecHub is your active profile. Select
SecHubas active profile, then press apply and close.
-
Before pushing your code please check your java format by executing spotless check.
./gradlew clean spotlessCheck
4.1.2. Switch to Dark theme (Optional)
Needs to be done for every new workspace.
-
Select
Preferencesfrom theWindowmenu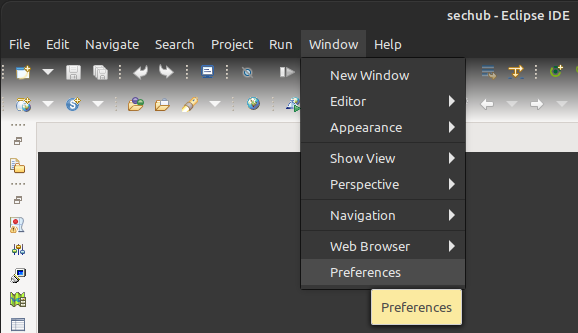
-
Search for
Darkin the input box. The menu pointGeneral → Appearanceshould appear as an option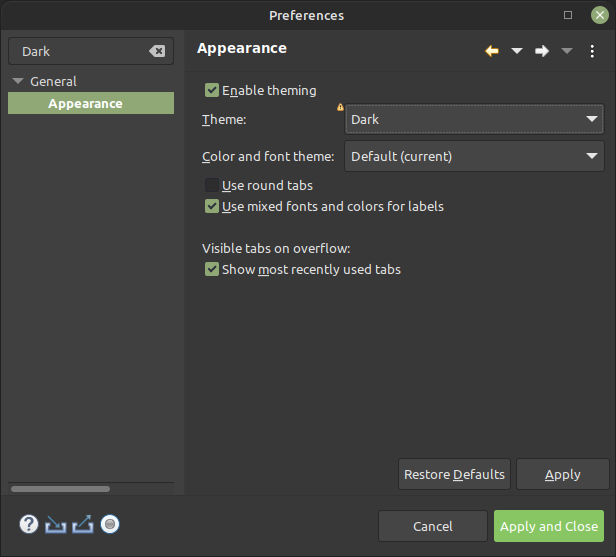
-
Select
Darkfrom the theme drop-down menu -
Press the
Apply and Closebutton
4.2. Set up IntelliJ for SecHub
Requirements: IntelliJ IDE (Community or Ultimate) is installed.
-
Fork and clone the SecHub repository from GitHub
-
Open the sechub project in IntelliJ (it will automatically detect the Gradle project)
-
Click on
File→settings→Java Compilerand switch the compiler to Javac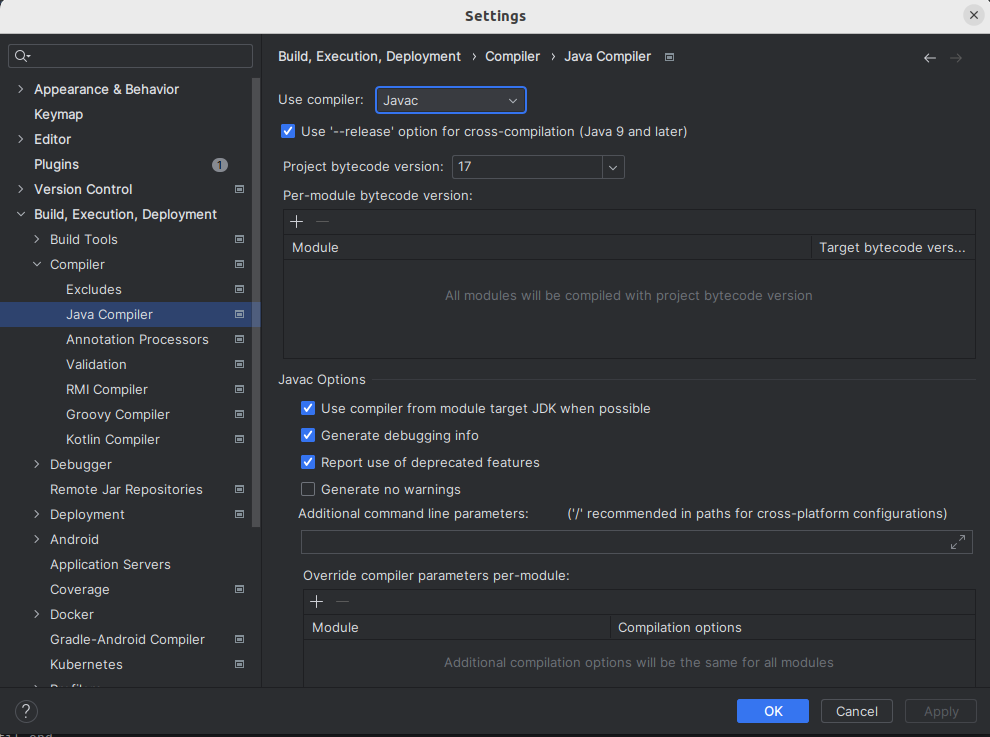
-
Click on
File→settings→Build, Execution, Deployment→Build Tools→Gradleand set theBuild and run usingtoIntelliJ IDEAandRun tests usingtoIntelliJ IDEA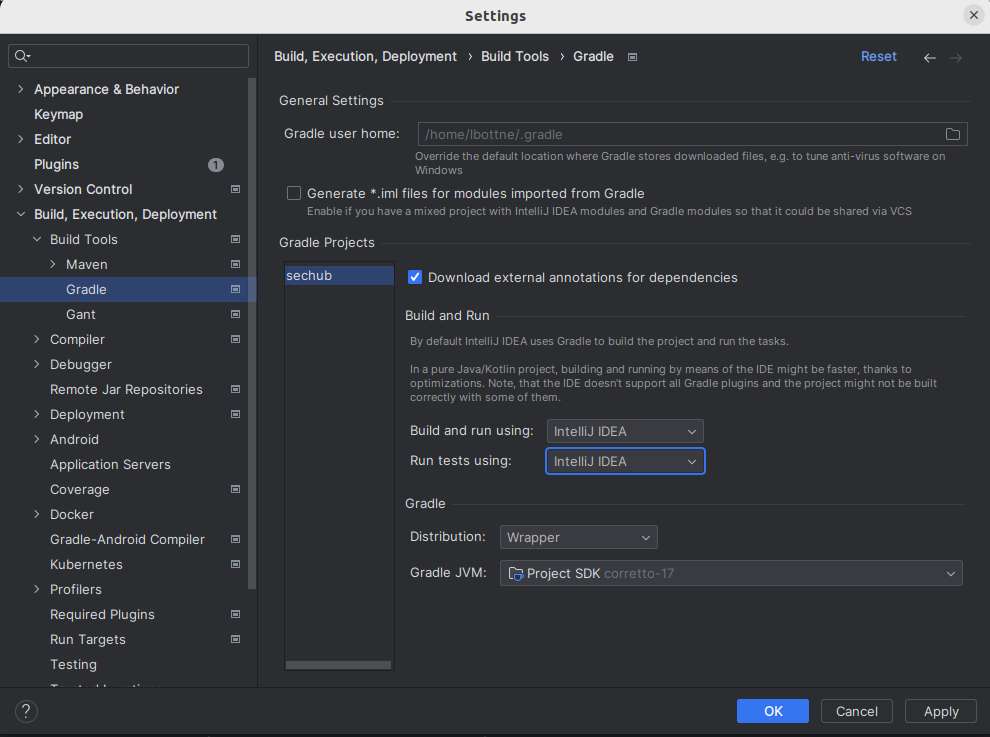
4.2.1. Add Sechub Java Code Formatter
-
Download the formatter xml file here and unzip it.
-
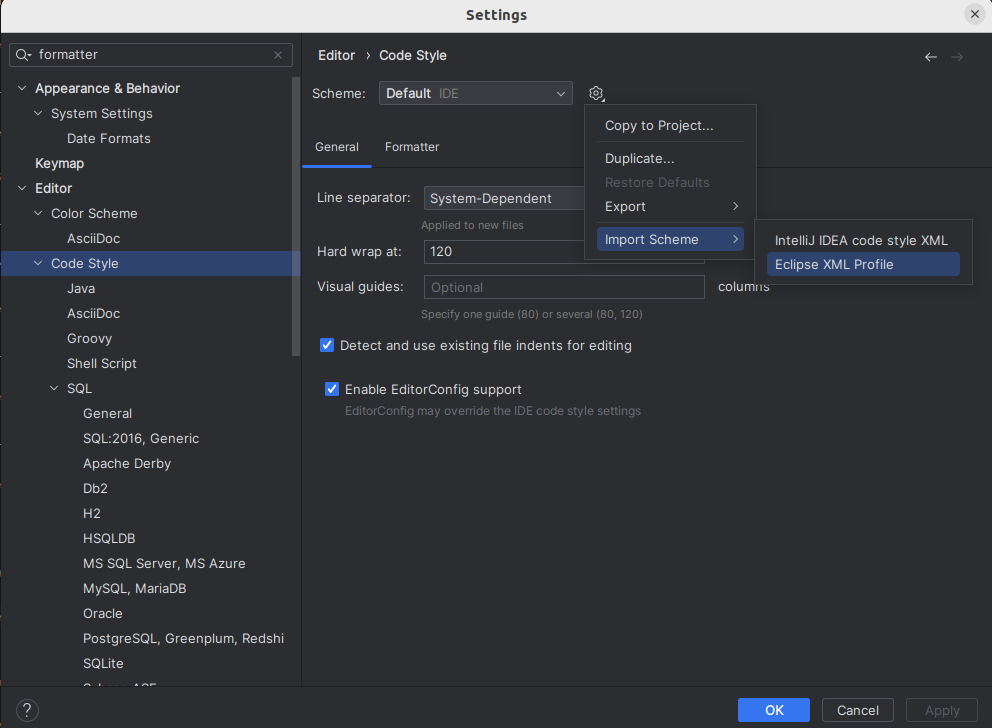
Open Java Formatter page in preferences (File→Settings). Then press the import button and select the former unpacked xml file.
-
Ensure SecHub is your active profile. Select
SecHubas active profile, then press apply and close.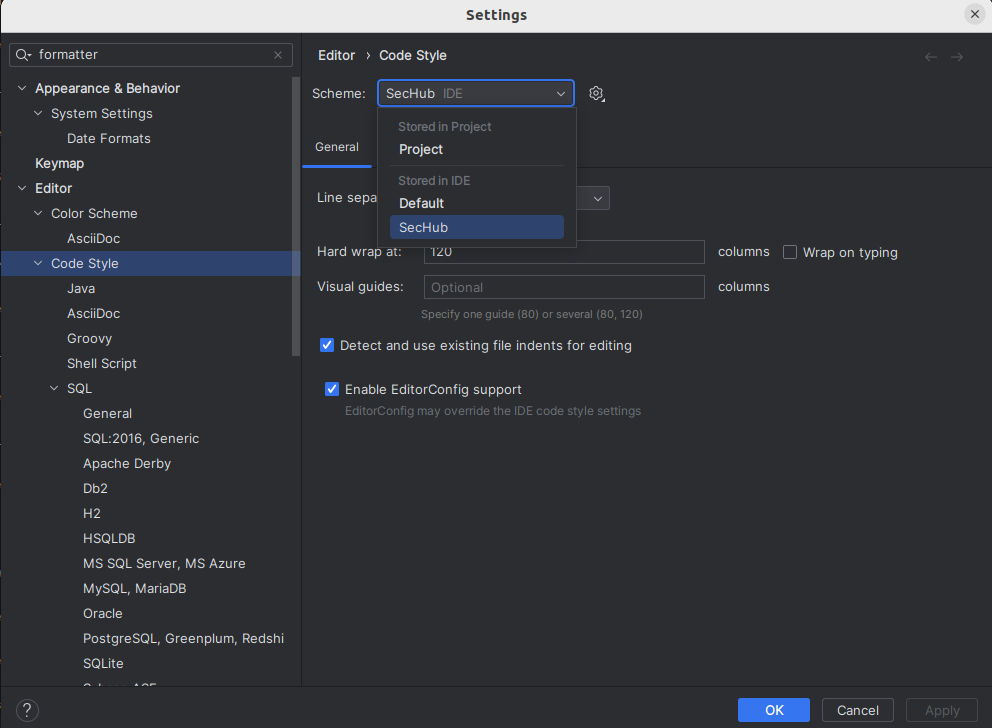
-
Before pushing your code please check your java format by executing spotless check.
./gradlew clean spotlessCheck
5. Run Integration Tests from IDE
5.1. Run Integration Tests From Eclipse IDE
We explain the setup based on the Free and Open Source Software (FOSS) Eclipse IDE.
5.1.1. SecHub Server
Run a SecHub server integration test.
5.1.1.1. Configure SecHub Server
Download the launch configuration for the Eclipse IDE: SecHubServerApplication (INTEGRATION TEST - H2)
-
Open the
Run Configurations…in the toolbar of the Eclipse IDE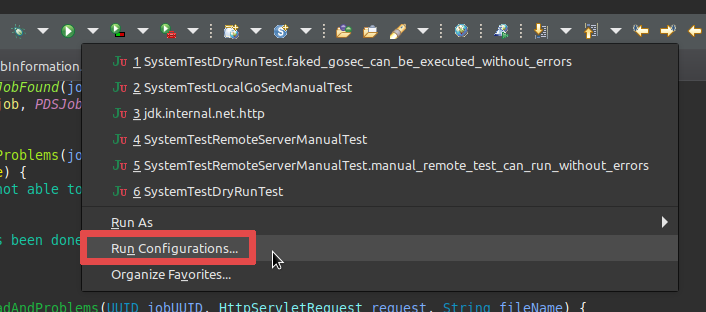
-
Right-click on
Java Applicationand selectNew Configurationfrom the context menu.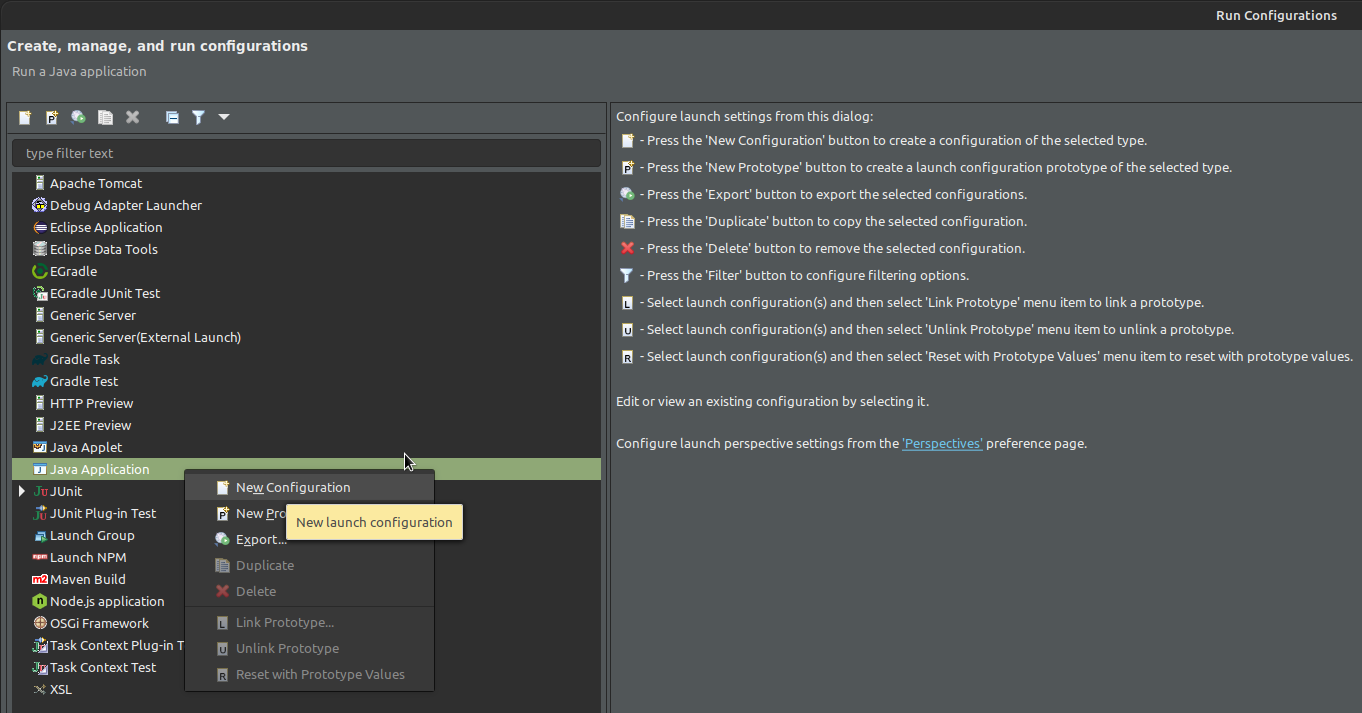
-
Name the new configuration
SecHubServerApplication_(INTEGRATION_TEST-H2) -
In the tab
Main:-
Project:Select thesechub-serverproject. -
Main class: com.mercedesbenz.sechub.SecHubServerApplication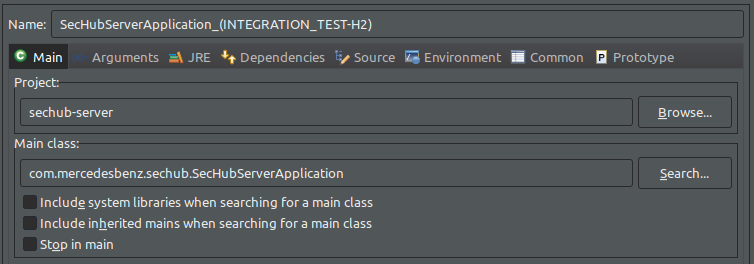
-
-
Next open the
Argumentstab and add the following arguments into theVM argumentssection:-Dspring.profiles.active=mocked_products,h2,integrationtest -Dsechub.server.debug=true -Dsechub.storage.sharedvolume.upload.dir=/home/<user>/.sechub/sharedvolume -Dsechub.targettype.detection.intranet.hostname.endswith=intranet.example.org -Dsechub.config.trigger.nextjob.initialdelay=0
Ensure you replace the <user>with your own user. Thesechub.storage.sharedvolume.upload.dirparameter must be set to a folder with read and write access on the system.
(On IOS, the path should be/Users/<user>/.sechub/sharedvolume)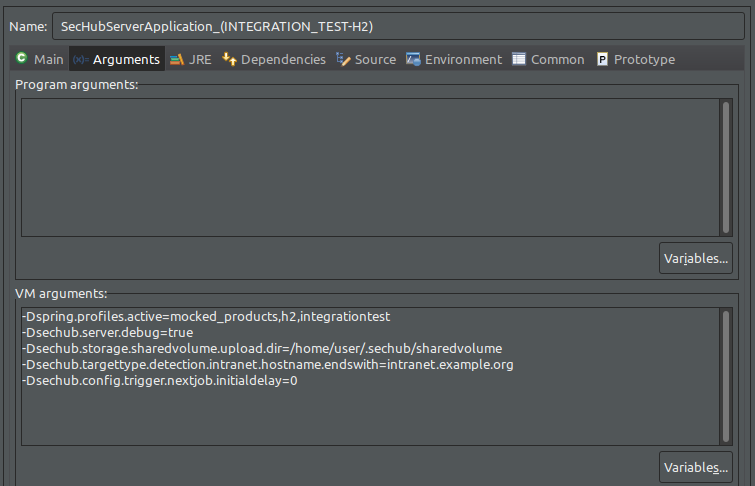
5.1.1.2. Run a SecHub server integration test
This section demonstrate how to run an integration test for the SecHub server using UserRegistrationScenario1IntTest.java as example.
Other SecHub server integration tests can be run in the same way.
-
Start SecHub server in integration test mode using the SecHub integration test launch configuration as explained in Configure SecHub Server
-
Select
sechub-integrationtest/src/test/java/com/mercedesbenz/sechub/integrationtest/scenario1/UserRegistrationScenario1IntTest.javain theProject Explorer -
Right-click on
UserRegistrationScenario1IntTest.javato open the context menu and selectRun Asand selectJUnit Testin the submenu.
-
Your first run will fail, as the run needs to be configured with the variables
-Dsechub.integrationtest.running=true. Therefore open the run configurations and select theUserRegistrationScenario1IntTest. Click on theArgumentstab and paste the flag-Dsechub.integrationtest.running=truein the VM arguments field, click apply and run the test again.
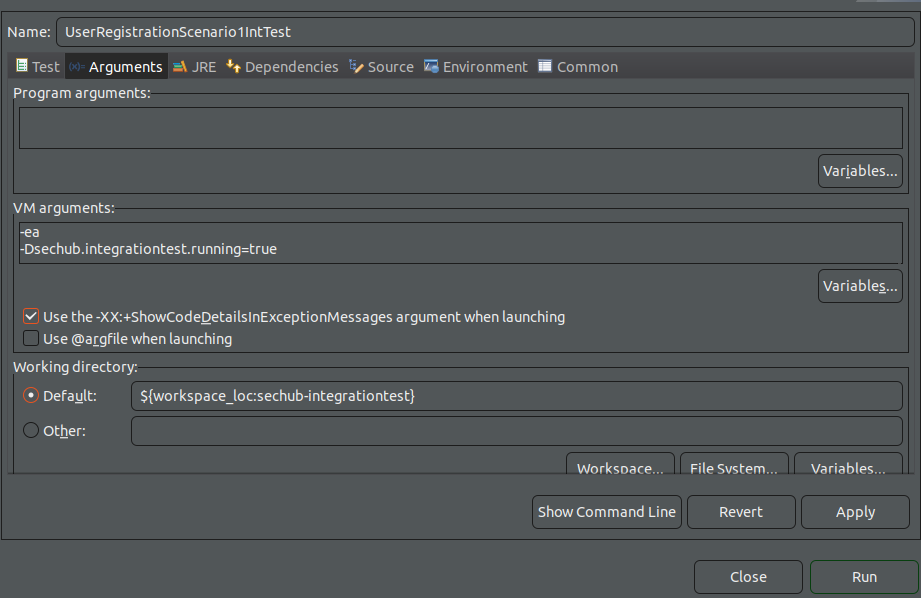
-
Check the JUnit tab, the result should be green indicating a successful run.
5.1.2. Product Delegation Server (PDS)
Run a Product Delegation Server (PDS) integration test.
5.1.2.1. Configure Product Delegation Server (PDS)
Download the launch configure for the Eclipse IDE: ProductDelegationServerApplication (INTEGRATION TEST - H2)
-
Open the
Run Configurations…in the toolbar of the Eclipse IDE
-
Right-click on
Java Applicationand selectNew Configurationfrom the context menu.
-
Name the new configuration
ProductDelegationServerApplication_(INTEGRATION_TEST-H2) -
In the tab
Main:-
Project:Select thesechub-pdsproject. -
Main class: com.mercedesbenz.sechub.pds.ProductDelegationServerApplication
-
-
Next open the
Argumentstab and add the following arguments into theVM argumentssection:-Dspring.profiles.active=pds_integrationtest,pds_h2 -Dpds.workspace.rootfolder=/home/<user>/.pds/workspace
Ensure you replace the <user>with your own user. It is necessary to set the foldersechub.pds.storage.sharedvolume.upload.dirto the same folder as configured for the SecHub server. -
Open the
Environmenttab and add the following environment variable:PDS_STORAGE_SHAREDVOLUME_UPLOAD_DIR=/home/<user>/.sechub/sharedvolume
Ensure you replace the <user>with your own user. It is necessary to set the foldersechub.pds.storage.sharedvolume.upload.dirto the same folder as configured for the SecHub server.
5.1.2.2. Run a PDS integration test
This section demonstrate how to run an integration test for the PDS server using DirectPDSAPICheckAliveScenario6IntTest.java as example.
Other PDS integration tests can be run in the same way.
-
Start PDS in integration test mode using the SecHub integration test launch configuration as explained in Configure Product Delegation Server (PDS)
-
Select
sechub-integrationtest/src/test/java/com/mercedesbenz/sechub/integrationtest/scenario6/DirectPDSAPICheckAliveScenario6IntTest.javain theProject Explorer -
Right-click on
DirectPDSAPICheckAliveScenario6IntTest.javato open the context menu and selectRun Asand selectJUnit Testin the submenu. -
Check the JUnit tab, the result should be green indicating a successful run.
5.1.2.3. Run a SecHub + PDS integration test
This section demonstrate how to run an integration test for the SecHub + PDS server using PDSCodeScanJobScenario5IntTest.java as example.
Other PDS integration tests can be run in the same way.
-
Start PDS and SecHub server in integration test mode using the launch configurations created in Configure SecHub Server and Configure Product Delegation Server (PDS)
-
Select
sechub-integrationtest/src/test/java/com/mercedesbenz/sechub/integrationtest/scenario5/PDSCodeScanJobScenario5IntTest.javain theProject Explorer -
Right-click on
PDSCodeScanJobScenario5IntTest.javato open the context menu and selectRun Asand selectJUnit Testin the submenu. -
Check the JUnit tab, the result should be green indicating a successful run.
5.2. Run Integration Tests From IntelliJ IDE
We explain the integration test setup based on the IntelliJ IDEA IDE.
First run the following commands to create the necessary certificates for the integration test servers:
./gradlew ensureLocalhostCertificate build -x :sechub-cli:build
./gradlew clean
5.2.1. SecHub Server
Run a SecHub server integration test.
5.2.1.1. Configure SecHub Server
-
Run the SecHubServerApplication in the
sechub-serverproject (it will fail) -
Open the
Run Configurationsin the toolbar of the IntelliJ IDEA IDE by clicking on the dropdown menu next to the run button and selectingEdit Configurations…
-
Select the
SecHubServerApplicationconfiguration and open theConfigurationtab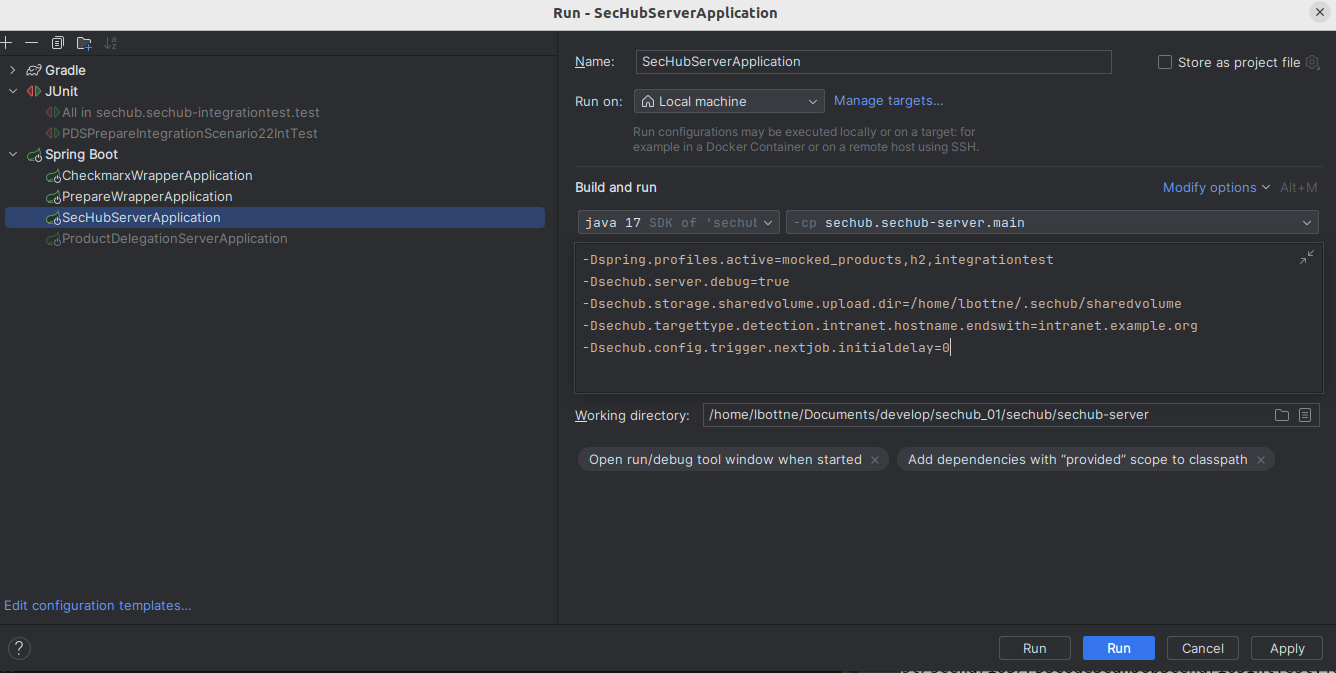
-
Click on the
Modify optionsdropdown and selectAdd VM options, add the following VM options:-Dspring.profiles.active=mocked_products,h2,integrationtest -Dsechub.server.debug=true -Dsechub.storage.sharedvolume.upload.dir=/home/<user>/.sechub/sharedvolume -Dsechub.targettype.detection.intranet.hostname.endswith=intranet.example.org -Dsechub.config.trigger.nextjob.initialdelay=0
Ensure you replace the <user>with your own user. Thesechub.storage.sharedvolume.upload.dirparameter must be set to a folder with read and write access on the system.
(On IOS, the path should be/Users/<user>/.sechub/sharedvolume) -
Click on the
Modify optionsdropdown and selectWorkspace directory, add the project module pathsechub-server
5.2.1.2. Run a SecHub server integration test
This section demonstrate how to run an integration test for the SecHub server using UserRegistrationScenario1IntTest.java as example.
Other SecHub server integration tests can be run in the same way.
-
Start SecHub server in integration test mode using the SecHub integration test launch configuration as explained in Configure SecHub Server
-
Select
sechub-integrationtest/src/test/java/com/mercedesbenz/sechub/integrationtest/scenario1/UserRegistrationScenario1IntTest.javain theProject Explorer -
Right-click on
UserRegistrationScenario1IntTest.javato open the context menu and selecttest. -
Your first run will fail, as the run needs to be configured with the variables
-Dsechub.integrationtest.running=true. Therefore open the run configurations and select theUserRegistrationScenario1IntTest. Click on theAdd VM optionstab and paste the flag-Dsechub.integrationtest.running=truein the VM arguments field, click apply and run the test again. -
Check the JUnit tab, the result should be green indicating a successful run.
5.2.2. Product Delegation Server (PDS)
Run a Product Delegation Server (PDS) integration test.
5.2.2.1. Configure Product Delegation Server (PDS)
-
Run the
ProductDelegationServerApplicationin thesechub-pdsmodule (it will fail) -
Open the
Run Configurationsin the toolbar of the IntelliJ IDEA IDE by clicking on the dropdown menu next to the run button and selectingEdit Configurations… -
Select the
ProductDelegationServerApplicationconfiguration and open theConfigurationtab -
Click on the
Modify optionsdropdown and selectAdd VM options, add the following VM options:-Dspring.profiles.active=pds_integrationtest,pds_h2 -Dpds.workspace.rootfolder=/home/<user>/.pds/workspace
Ensure you replace the <user>with your own user. -
Click on the
Modify optionsdropdown and selectWorkspace directory, add the project module pathsechub-pds -
Click on the
Modify optionsdropdown and selectEnvironment variables, add the following environment variables:PDS_STORAGE_SHAREDVOLUME_UPLOAD_DIR=/home/<user>/.sechub/sharedvolume
Ensure you replace the <user>with your own user.
5.2.2.2. Run a PDS integration test
This section demonstrate how to run an integration test for the PDS server using DirectPDSAPICheckAliveScenario6IntTest.java as example.
Other PDS integration tests can be run in the same way.
-
Start PDS in integration test mode using the SecHub integration test launch configuration as explained in Configure Product Delegation Server (PDS)
-
Select
sechub-integrationtest/src/test/java/com/mercedesbenz/sechub/integrationtest/scenario6/DirectPDSAPICheckAliveScenario6IntTest.javain theProject Explorer -
Run
DirectPDSAPICheckAliveScenario6IntTest.java -
Check the JUnit tab, the result should be green indicating a successful run.
5.2.2.3. Run a SecHub + PDS integration test
This section demonstrate how to run an integration test for the SecHub + PDS server using PDSCodeScanJobScenario5IntTest.java as example.
Other PDS integration tests can be run in the same way.
-
Start PDS and SecHub server in integration test mode using the launch configurations created in Configure SecHub Server and Configure Product Delegation Server (PDS)
-
Select
sechub-integrationtest/src/test/java/com/mercedesbenz/sechub/integrationtest/scenario5/PDSCodeScanJobScenario5IntTest.javain theProject Explorer -
Run the
PDSCodeScanJobScenario5IntTest.java -
Check the JUnit tab, the result should be green indicating a successful run.